It’s holiday time, and as such, the geek within is restless. Today’s task is to prepare an OS X installer on a USB drive, starting from an Apple Disk Image (.dmg), without access to a Mac. (Note: the limits imposed above were purely for the fun of it – I have access to a functioning triple boot Hackintosh, but realise that many people trying to create such a Hackintosh for the first time do not.)
The next few posts will chronicle the necessary steps to complete a triple boot (Windows 7, Ubuntu 10.10, OS X 10.6.5) setup on a (non-Mac) notebook.
Background:
For the above mentioned setup, a modification is required to the Snow Leopard installer so that it will accept an MBR (master boot record) type destination disk, instead of only a GPT (GUID partition table) type destination disk. The need for MBR stems from Windows, which is currently unable to boot from a GPT disk on a non-EFI system (although, Windows 7 does recognize GPT disks).
As a side note, there are two ways that can be used to install Windows on a GPT disk:
- It is possible to install an implementation of EFI (e.g. EDK2/tianocore), however, the success rate tends to be low and the complexity is high.
- A more practical solution is to use a hybrid GPT/MBR drive, which is easy to setup, and works well. The problem with this is that Windows can only see 3 (4 with EFI) partitions (which, as I typically have 5 partitions in addition to my operating systems, will not work)
Most Windows tools are unable to work with a DMG file, and from my experience, those that can, have difficulty with the OS X installer. Furthermore, since we will need to modify the installer, a more complex route would be needed if a piece of software can only burn the image to disk (and not modify it).
Overview:
The best way to get the contents of a DMG image onto a USB drive is by using Mac’s Disk Utility. Since we are doing this without accessing a Mac (we are starting on a Windows machine), we are going to use the Disk Utility on the Snow Leopard installer, and will access it through a virtual machine. Despite the seemingly long procedure that follows, the steps take less than 15 minutes to follow (plus the 1 hour wait for the DMG to extract).
Prerequisites:
Before we begin, you will need:
Hardware:
| Device | Purpose |
| An 8GB+ USB Drive | Will be used for the OS X installer |
| A 1GB+ USB Drive | Will be used for miscellaneous files |
| A blank CD (or a 64MB+ USB drive) | Will be used for the initial boot loader (iBoot) |
Software:
| Software Title | Purpose | Version Used |
| VirtualBox | Used to create virtual machine | 4.0.2 |
| VirtualBox Extension Pack | Needed for VirtualBox USB support | 4.0.2 |
| Virtual Clone Drive | Used to mount disk images | 5.4.4.0 |
| iBoot | Disc with Chameleon bootloader | 2.6 |
| Snow Leopard Image | OS X Installer (unmodified) | 10.6 (10a432) |
| OSInstall.Framework | Needed so that Snow Leopard will install on an MBR disk (alternate link) | 10.6 |
| OSInstall.mpkg | 10.6 |
Additional Software, Post-Install (not used in this guide):
| Software Title | Purpose | Version Used |
| MultiBeast | Post-install drivers and customization | 3.1 |
| Mac OS X Combo Update | Used to update Snow Leopard to the latest version | 10.6.6 |
Of course, a bit of patience and tech savvy will go a long way.
Procedure
First a few screenshots of the process, to add a little clarity along the way (each image is also linked at the relevant part of the article).
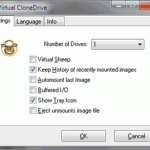
- Install Virtual Clone Drive (it will install a driver that might trigger a security warning)
- Install VirtualBox
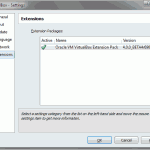
- Add the Extension Pack to VirtualBox [Image]:
- Open VirtualBox
- Goto File > Preferences
- Select Extensions
- Click the ‘Add Extension’ button and open the Extension Pack
- Setup the virtual machine
- Firstly, we are going to insert our 8GB USB drive, we will need to tell the virtual machine about it
- Click ‘New’ on the toolbar to create a new virtual machine
- Give it a name: OSX
- Select a type: Mac OS X (version: Mac OS X Server) [I don’t think these matter in this case)
- Allocate some memory: 1.5GB (1536MB) [1GB, maybe less will work fine as well]
- Uncheck ‘Boot Hard Disk’ (our machine will not need one, but you can create one if you wish)
- Click Finish and the new Virtual Machine should be displayed in the left panel of the main window
- Select the Virtual Machine (OSX) and click Settings and make the following changes:
- System: Boot Order: Set CD/DVD ROM first
- System: uncheck enable EFI
- Display: increase the video memory (I set 48MB) and enable 3D acceleration
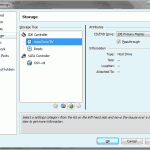
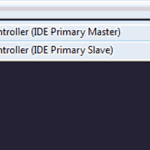
- Storage: add an empty CD/DVD Device to the IDE Controller (there should be 2 devices under the IDE controller now) [Image]
- Select the topmost IDE device, and set it as the primary master, mapped to Host Drive E, and check Passthrough. This will contain iBoot that we will boot the virtual machine with. Leave the second IDE device empty for now.
- USB: click the add a USB filter from device button and select your USB drive (this step does not appear to be significant)
- Click OK to save your settings
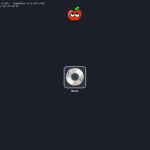
- Start the Virtual Machine, it should load iBoot and bring you to the Chameleon screen. If you get a ‘Could not read from the boot medium’ error, ensure that your iBoot image is mounted with Virtual Clone drive to the same drive letter mapped to the Primary IDE Master (check it in Windows Explorer). I did notice that if the drive was unmounted from VirtualBox, Virtual Clone Drive would still report it as mounted (even though Windows Explorer showed otherwise). In this case, simply unmount the drive from Virtual Clone Drive and remount it. Select Reset from the Machine menu in to reboot your Virtual Machine.
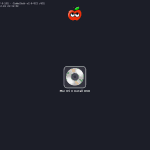
- Once you are at the Chameleon screen, you should only see the iBoot disk listed [Image]. Through VirtualBox, change the disk to the OSX Installer [Image].
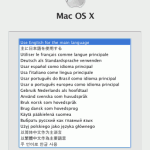
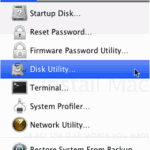
- When the installer loads, choose your language [Image], and agree to the License Agreement. Once you reach a screen [Image] where the Utilities menu is visible select Disk Utility from the Utilities Menu [Image].
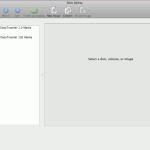
- You should see your USB Drive listed on the left panel of Disk Utility. We need to change the partition scheme from MBR to GPT.
- Select the USB drive (not one of its partitions)
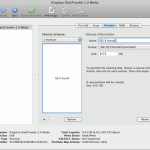
- Goto the Partition tab [Image]
- Under Volume Scheme, select 1 Partition
- Give it a name (OS X Install), and select Mac OS Extended (Journaled) as the format
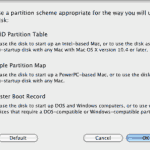
- Click Options [Image]
- Select GUID Partition Table
- Click OK – this will erase any data on the disk
- Click Apply
- When done, you should see a single partition (OS X Install) listed under your USB drive
- You will now need to load the DMG image into the second IDE drive (it remains in the first drive as well – if you already have the Installer showing up in the left panel of Disk Utility you don’t need to do this).
- Devices (Menu): CD/DVD Devices: IDE Controller (IDE Secondary Master): Choose a Virtual CD/DVD disk file (browse for or select the DMG installer file).
- After a few seconds, a new device should show up in Disk Utility, called VBOX CD ROM, and its only partition should be Mac OS X Install DVD. You want to restore this partition to the USB drive.
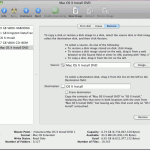
- Click the Restore tab (it doesn’t matter what item you have selected) [Image]
- Drag the Mac OS X Install DVD from the left panel to the Source box
- Drag the OS X Install partition to the Destination box (ensure you are copying to a partition and not the drive itself)
- You can uncheck erase destination (as it is a clean drive)
- Click Restore, it will take about an hour to complete (faster on a USB hard drive)
- We now need to modify the Installer so that it will work on an MBR partition, since Windows can’t (natively) read HFS+, we could use Linux, but since we already have the Mac installer running, we will use that. Sorry, but this will require the command line.
- Insert the second (1GB) USB drive, copy the following files onto it (through Windows Explorer):
- OSInstall.Framework
- OSInstall.mpkg
- MultiBeast (not used in this guide)
- Mac OS X Combo Update (not used in this guide)
- Unzip the two OSInstall files to the root of the drive (i.e. don’t make any new folders)
- Attach the drive to the virtual machine [Image]
- Right click the USB icon in the status bar of VirtualBox, and check the new USB drive
- After a few seconds, Disk Utility should list the new USB drive on the left panel [Image]
- Note the name of the partition (in my case KINGSTON)
- Close Disk Utility
- Disk Utility: Quit Disk Utility
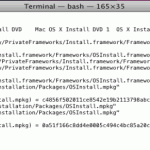
- Open Terminal [Image]
- Utilities: Terminal
- At the command prompt, type the following:
cd /Volumes(this will get us to the directory where ‘devices’ are mounted)ls(this will display the volumes)- There should be
- Mac OS X Install DVD (the installer we are running)
- Mac OS X Install DVD 1 (the second copy we mounted)
- OS X Install (the copy of the Installer on our 8GB USB drive)
- And a fourth volume corresponding to our new USB drive (e.g. KINGSTON)
- We need to copy the two OSInstall files from the new USB drive (KINGSTON) to the USB Installer (OS X Install). Two quick points of mention: a) take your time, read your command over before pressing enter b) you must enclose folders names with spaces in them in quotes c) you can edit the last line by pressing the up arrow key.
- Change to the directory of your USB drive (replace KINGSTON with your drive name)
- We must copy OSInstall to System/Library/PrivateFrameworks/Install.framework/Frameworks/OSInstall.framework/Versions/A/OSInstall
- We must copy OSInstall.mpkg to System/Installation/Packages/OSInstall.mpkg
- If you wish, you may verify that the files were successfully overwritten by checking the MD5 sums (which should match for each pair):
cd KINGSTON
cp OSInstall "/Volumes/OS X Install/System/Library/PrivateFrameworks/Install.framework/Frameworks/OSInstall.framework/Versions/A/OSInstall"
cp OSInstall.mpkg "/Volumes/OS X Install/System/Installation/Packages/OSInstall.mpkg"
md5 OSInstall  "/Volumes/OS X Install/System/Library/PrivateFrameworks/Install.framework/Frameworks/OSInstall.framework/Versions/A/OSInstall"
md5 OSInstall.mpkg  "/Volumes/OS X Install/System/Installation/Packages/OSInstall.mpkg"
- Detach your USB drives from the virtual machine
- Insert the second (1GB) USB drive, copy the following files onto it (through Windows Explorer):
- Close the Virtual Machine and you should have a functioning OS X Snow Leopard USB Installer.



This is exactly the installation guide I’ve been looking for but does it work on AMD CPUs? I’ve get to the gray Apple logo screen and it freezes. Thanks in advance.
OS X will not natively install on an AMD as far as I know – you will need a modified kernel and modified installed (much like the OSInstall modification used to install on MBR). I know that many people have had success using AMD CPUs, however, I have no first hand experience with them. In theory, anything you would do to successfully boot from the iBoot CD on the real PC, may be needed to get it to work on the virtual machine – but I do believe that iBoot does support AMD CPUs, and white it might take a bit of trial and error, you should be able to make it work – check out the iBoot site or try another boot CD such as the Empire EFI boot disk, the other steps would remain the same. Remember that this guide is only to prepare a USB installer without access to a Mac, not to actually install it on a computer (although, the latter guide should be easy to come by).
this guide is awesome! but i’ve encountered a problem: my usb drive is not recognized in disk utility at step 8… well, maybe i missed something on the configuration of the vm. if i try to enable it from the bottom icon on virtualbox selecting “sandisk cruzer micro” (my usb flash drive), i get this error “failed to attach the usb device Unknown Device to the virtual machine”.
Should it work with a different usb drive or i did something wrong?
Edit: plug-unplug-plug-unplug-plug-unplug-plug-unplug…-plug, and it just works :’D
Thanks for the comment – glad you liked the guide. I did find the USB step to be a bit unusual at time – you can actually get it to work without first adding a USB filter – it will still work. When I encountered the problem you had, I found that closing and reopening VirtualBox was helpful, or sometimes a complete restart of the computer – typically, if Windows (Explorer) showed the drive before starting VirtualBox, I had no problem adding the drive in VirtualBox; sometimes if the drive was added while using VirtualBox, the program was a bit more finicky as to whether or not it would recognize the drive (but, as mentioned, a restart would fix that). Good to know you got it working for you in the end.
One more question.. recently went out the MacOSXUpdCombo10.6.6. Do you think i can apply the same procedure using that?
Well, this guide doesn’t actually use the ComboUpdate – that was meant for a second guide about actually installing OS X, but I haven’t quite decided whether or not to write that one (they are fairly common online). This guide is just about how to make the installer starting from a DMG without access to a Mac, once you have the installer, you can install the operating system (boot the USB drive using iBoot), and then update it. Unlike Windows you cannot integrate the updates into your installer, they must be installed after the installation is complete. In other words, you shouldn’t have a problem using the latest ComboUpdate – but you might want to check that it will work with your hardware – it is a step to consider after you have managed to install OS X.
Hi!
I’m trying to get trought your guide but OSX won’t find my USB stick? I have added a filter and it’s formated as FAT32 in Windows. What to do?
Please help me out.
There does appear to be some luck needed with the USB part, but it usually seems to be related to VirtualBox, not to OSX. The step with the filters is, in retrospect, unnecessary. You must be able to add the USB drive through VirtualBox, if the USB drive doesn’t show up in VirtualBox’s list (look at the status bar) then you might need to eject the drive from Windows (which sometimes allows VirtualBox to recognize it).
I would suggest trying the following if VirtualBox is not recognizing your USB drive(s):
Close VirtualBox
Eject and unplug any USB drives
Plug in both USB drives and wait until they appear in Windows Explorer
Start Virtualbox
Start the Virtual Machine
I found that having the drives plugged in before VirtualBox started increased the success rate significantly. When VirtualBox recognizes the drives they will not longer be visible in Windows. Hopefully it works for you.
Hrm….have been playing with this for a few days now and since I didn’t have a dual layer DVD handy, I figured I would try this method. It’s worked better than any other method I’ve found so far but when I restore to USB it starts the process and then kind of freezes. Right now it’s been stuck with “59 minutes remaining” for the past hour. I’m going to let it go for a while longer anyway but the LED on the USB stick isn’t flashing to indicate transfer anymore. The VM hasn’t frozen, it just doesn’t seem to be restoring anything anymore.
Thanks for the comment. Glad to know you are seeing some success with the method (I was actually in the same scenario the first time I tried it, no DVD-DL handy). While I was setting up my own machine, I ended up going through this procedure a couple of times, one of those times, I did notice that the progress appeared to freeze – more specifically, it didn’t move smoothly – it would be stuck on a number for a long time, and sometimes, moving the mouse would help, other times, it made no difference. If I recall though, it did finish successfully in the end. The lack of USB light is a bit unusual, I think mine remained on constantly (not flashing) throughout the process. Good luck with it, and let me know if it works out for you.
Great guide! Really simple to follow…
What happens next? Do we boot up into the USB Drive? Do we need to use iBoot to boot into HDD? If so how do we burn iBoot as a bootable USB stick?
Glad you found it useful, thanks for the comment.
You should be able to find the procedure for installing OS X (including using iBoot) from quite a number of sites – take a look at:
OSX86 Project and
iBoot & MultiBeast Install
Essentially:
You will need to use iBoot to boot your machine (the most common way is to burn it onto a CD/DVD and boot from that, although, it is possible to create a bootable USB installer)
Insert the USB drive (before or after iBoot loads, it can be machine dependent)
Refresh iBoot (F5) to see the installer (essentially the same as you did for the above procedure)
Boot the installer (select and enter)
You may need to set specific boot options depending on your machine (for instance, I need to set busratio for my computer to boot the installer); look at the chameleon bootloader options.
After that, simply follow the installer instructions, and you should be good to go (there are some post install setup steps which you will need to be able to boot without iBoot)
Good luck with the setup.
Great tutorial. Thank you. The other websites only tell you how to do this when you already have a Mac or a Hackintosh.
For people wondering how to get the USB to boot, visit this website:
http://konteudos.info/?p=3296
Of course you don’t have access to the Chameleon installer mentioned in the second video on that website (i.e. Boot iatkos S3 Snow Leopard USB). You can do the boot loader installation by downloading the Chameleon boot loader from its official website and following the installation instructions in the README, using the terminal in the virtualbox. Finally, after successful installation, visit this link to get your graphics card working properly
http://aquamac.proboards.com/index.cgi?action=display&board=hack1&thread=509
The only extra thing that I had to do was to also copy the com.apple.boot.plist to the /Extra folder.
Thanks for the comment and links; glad you found it useful. If you have a bootable ISO image (e.g. iBoot) you can use UNetbootin to create bootable USB drive from it. Chameleon hasn’t had a new release in a while – I believe that tonymac86’s group created a fork with some updates and improvements called Chimera.
I had to copy the dmg file(duplicate) because i was getting access errors trying to open the same file with 2 drives. once i just mounted the secondary cd to the duplicated dmg file it worked np and showed up in disk utility (for the cd to usb drive restore part of the process)
Thanks for the comment – that sounds like a reasonable solution, although the problem appears to be rather uncommon. It would be expected that the file is only being read from (i.e. nothing is writing to the dmg file) – which should allow multiple processes to access it simultaneously without issue.
Thank u so much for this tutorial, but OSInstall links on the top are dead, can u reupload them? 🙂
The links are to an external site that has recently changed its available files. As the files are not my creation, I will not upload them, however, if I get a chance over the next few days, I might generate a diff for the original files that you can apply to patch your files to be MBR compatible. In the meantime though, you shouldn’t have too much difficulty finding the two files online – just remember to include ‘mbr’ as well as ‘snow leopard’ in your query (the files are at least somewhat version dependent). Alternatively, you can ask the site that originally created the files to make them available, or you can install to a GPT drive (which will only work if you aren’t booting Windows).
Given that some time has passed, and the original site has not made the files available, I have provided an alternate link from which they can be downloaded for the next (few?) month(s).
BEST TUTORIAL EVER!!!!!!!!!!!!!!!!!
SOMEONE KNOWS WHAT HE IS DOING!!
Very good explanation, confirming the steps with images and and and………..everybody can do this without any problems.
And the best is you don´t even need a mac……..the tutorials out there are all about already having osx runing, or format with a mac, or use disk utilities on your friends, and…….
Out and a huge THAANKKSSS to CYBERX86
Hey! I love the guide and it was all going VERY well for me; however, after switching to the install dmg file in the virtual machine, I get the Apple logo, and then an error message. I followed all the steps you had listed, and I can’t find any reason it shouldn’t work. I’m running Windows 7 Premium if it helps, Intel Pentium. If you can help me out I’d greatly appreciate it. Email me if you can.
Thank you very much!
If the error message you got was a kernel panic, the likely reason is because Pentium processors are not officially supported by Apple. OSX runs well on systems that have CPUs that Apple used in its own devices – primarily the Core 2 Duo and later (e.g. Core i3/5/7) – they never used Pentium processors. To make the Pentiums work you need a modified kernel. As far as I know, VirtualBox passes the instructions directly to the underlying CPU – it is only in rare cases that it will perform any recompilation. You may look into using QEMU – but I can’t offer any advice on how to make your setup work on it. Since you will need to look into alternate options, consider starting with The OSX86 Project, OSX86.net, and TonyMacx86 for ways to get OSX working on a Pentium. Sorry I can’t offer better news.
That’s okay, I got it. Luckily I have access to a computer with Core 2 Duo. I actually plan on using the TonyMacx86 forums on my first build. Again, thanks for the quick response.
Good to know – glad it worked out for you.
Me again. I got much farther this time, however, I meet yet another error. I am in Terminal, I type ls, I change my drive to “cd AE” (without quotations as there is no space), everything seems okay until I type the lengthy command.
I’m typing:
cp OSInstall "/Volumes/OS X Install/System/Library/PrivateFrameworks/Install.framework/Frameworks/OSInstall.framework/Version/A/OSInstall"and I get the error:
cp: /Volumes/OS X Install/System/Library/PrivateFrameworks/Install.framework/Frameworks/OSInstall.framework/Version/A/OSInstall: No such file or directoryAny suggestions? I’m thinking it could be possible my install image may differ minutely from yours, and therefore the location is different? Maybe that isn’t likely. I don’t know! But whatever is going on irks me; hopefully you can shed some light.
Thanks,
Anthony
I’d suggest that the problem lies in the name of your disk – chances are that your disk is not named
OS X InstallUnder step 11.E.iii and 11.E.iv, there is the equivalent of the following command:
Running it should list the names of the volumes you have mounted. Check the name, and replace
OS X Installin the path I used in the command. If you have the same volume name but it still doesn’t work, go through directory by directory until you find where the command fails. For example:The
lscommand lists the contents of a directory, while thecdcommand changes to that directory. Essentially, with the above set, you are checking directory, by directory, the contents and whether the next directory exists. With each command, the next directory should be in the list that is displayed. (Note that quotes are needed around paths that contain spaces).Wow. You have to be one of the smartest people I know (or rather don’t know, haha!)
I just finished, and double checked. It was “OSX Install” not OS X Install”! How foolish of me!
Now I assume I will move on, where I will (most likely) meet more problems requiring your service!:D
Thank you VERY much!
High praise indeed – especially if ‘intelligence is the key to everything’. Glad to see you found the problem and were able to get past it. I suppose that the irony here is that a) this article (one of the most popular on this site) is one of the least technically interesting and b) I am more of a scientist than a computer person. Then again, for me, as long as I have a good problem, I am quite content – computer problems just happen to be the most abundant and easiest to prove. Perhaps such deduction is my little digital mimicry of Sherlock, since I lack the requisite powers of observation in daily life to aspire to such a persona. Enough introspection for the moment, however – thanks for the problem (and for following up). (I will concede that the deduction was a fairly straight-forward one – the error message was quite clear (the path did not exist) – presuming you copied and pasted it, there was a low probability of typos – the only variable would, therefore, be the disk name (/Volumes is a fixed path, as is the rest of the path) – when you eliminate the impossible, whatever remains, however improbable, must be the truth.)
Hey cyberx86
I followed your guide (big up’s!) top to bottom. The problem i’m facing right now is, that i’m stuck in the gray apple loading screen after i selected the osx install dvd (the usb stick) in iboot. The little loading wheel keeps spinning (20 min +) but nothing happens, the installation won’t go on. Do you got any idea what the problem could be or how to fix it? If you need information about my system let me know, any help would be highly appreciated.
Peace
Simon
When you boot chameleon, you can specify some boot options – it may take some trial and error to get it right. For me, I needed to specify the busratio in order for the system to boot. If you have an Intel processor, you can find the bus/core ratio by looking up your processor on their site (for instance, my laptop has a Core i5, 430M processor – it’s busratio is 17). There is also a handy list of some of the first generation Core i3/i5/i7 processor bus ratios, here. So, if I want to boot my installer, I have to specify busratio=17 at the chameleon prompt. Other than that, try a few different settings (and perhaps a different version of iBoot – there used to be some versions for specific chips, and I believe I used one of the non-standard versions in the end. I think they might have done away with that though, and gone with a single version).
hey cyberx86, I just finished doing your guide and I must add that, it is absolutely perfect, I ran into a few problems a few times, but I got through it without any hickups.
So after I have my USB with retail SL DVD, do I boot up iboot, eject ibook CD, insert USB, press F5 and click OS X Install DVD ? When I did this the first time, It didn’t work it said that “Operating system is not found” or something like that. What do I do next ?
Much appreciated! Thanks
It has been quite a while since I setup Snow Leopard, however, your steps do sound mostly correct. Operating system not found is an unusual error – sounds more like what the BIOS would say than an iBoot message. I’d recommend taking a look at one of the other available guides that detail how to proceed once you have the installer. You can find a wide variety of them on the OSx86 project wiki. For instance, one from tonymacx86 should mostly continue where this article left off (except you don’t want to partition as GUID if you added the OSInstall files).
Hey cyberx86,
Great guide and helped clear up a lot of information for my hackintosh noob skills. Unfortunately I had to install Snow Leopard and then restart the virtual box because it froze up when plugging in the 2nd usb drive.
After I have restarted Virtual box, I ran the terminal and inserted the commands as followed and got to this error when I tried to copy the OSInstall files
Read-Only File System
How can I make it read/write?
If the image was successfully copied to the disk, you shouldn’t have that problem. However, you can try to remount the disk (the one you copied the installer image to). So, in my case, where the disk is mounted at “/Volumes/OS X Install/”:
(The above command essentially says to update (
-u) the mounted file system (we pass the mount point), making it read-write (-w).Good evening, I am attempting to set up my first hackintosh on my older laptop (Dell M1530) and I have been following your guide. But when I attempt step 6C, I see the image start to load and the virtual machine goes gray with a dark gray apple in the center. Then I get the following message, “A critical error has occurred while running the virtual machine and the machine execution has stopped.” Then the virtual machine closes. I believe the only difference from your instructions is that I created an iso image (7.9 GB) of snow leopard from a retail dvd using Infrarecorder as recommended by another guide. I am kind of stuck since my internal dvd drive died and my system bios does not support booting from a usb dvd drive. So I have to get this onto a USB drive in order to install this OS. Also, I disabled speedstep in my bios as directed in other guides as well.
My system Specs:
Intel Core 2 Duo T9300 @ 2.5 GHz
4 GB RAM
NVIDIA GeForce 8600M GT
Thank you for your help!!
Offhand, I suspect that the problem lies with the CPU not being natively supported. It has been a while since I worked on this, but I seem to recall that the processors before the Core i3/i5/i7 line (including the Core 2 Duo) require some additional steps to make things work. Since virtualbox is passing instructions through to your processor with a minimum of modification, this is likely to be the issue.
Unfortunately, I don’t have any suggestions that I really believe will work. None the less, here are some ideas to get you started: 1) if you aren’t certain about the image you created and are using a USB dvd drive, you can read directly from the drive instead of using your image (Step 6A, choose the drive instead of the image, e.g. ‘Host Drive D:’); 2) Look at the options for iBoot – when I did this, there were multiple versions of iBoot available, some were better suited to certain hardware than others. I believe that they have since combined all the versions, but an older more specific version may be helpful none the less. Also, look at the chameleon boot options. For instance, once of them is the busratio, which may be relevant in some settings (I need it when booting from the disk I create, but not in the Virtual Machine). I believe your CPU has a busratio of 12.5. 3) You may explore other methods of virtualization such as QEMU. 4) You could try using
dmg2imgto convert the file into a format that Windows/Linux can work with a bit better.There may be some other approaches (mostly involving a second computer, and/or more hardware solutions, but I’ll leave those to you). It does seem unusual that a computer will boot from a USB drive, but not a USB DVD drive, so you may want to verify that before going much further.
Good luck.
Thanks to your help, I have gotten a bit further. But still no luck. Using the -v flag along with a iboot specifically for my computer and snow leopard, I see all the drivers load and then the following is posted before the system crashes: “starting darwin x86.” I have tried various flag combinations with no luck. Also, I was able to use my external usb dvd drive with the retail copy of snow leopard in Virtual Box if I set the passthrough flag for the IDE primary drive!! If you have any suggestions on how to get past the darwin error, I’d appreciate the guidance! Thanks again!
Again, not a lot of suggestions. Your options are pretty much limited to bootloader flags (play with -x32 –v –x -f cpus busratio); a different bootloader (try PC_EFI, an earlier version of chameleon, or perhaps chimera); a different kernel (a bit harder to implement, but I believe you can specify the kernel as a boot option if you obtain one that might work); or a different virtualization platform (perhaps VMware would work instead of VirtualBox).
Just thought I would let you know that things magically started to work. I tried everything you suggested and also everything I could find in various forums to no avail. So I decided to burn iboot to a disk and try it on a friends computer to see if we could get it to boot on his. While I was burning the disk, I found another suggestion involving Mac drive. So I installed that after my burn finished, which required a reboot. I walked away from the computer while it was going through the boot process and when I came back, there was the iboot boot loader in all its glory! I had not removed the disk from my EXTERNAL USB DVD DRIVE! Mind you, I tried booting from my Windows 7 DVD multiple times and read numerous articles that said you CAN NOT boot from an external usb dvd drive with a Dell M1530!! So for that one person out there that has been searching for a solution to this for the past 3 weeks, like myself. Here is how to boot with an external usb dvd drive on a Dell M1530. I have bios version A12 and my external drive is an ASUS SBW-06D2X-U. The M1530 has 3 USB ports, 2 on the left and 1 on the right. The drive must be plugged into the one on the right, for some reason my M1530 will not boot from the DVD drive connected to the 2 left USB ports. In your bios, set your boot order to 1. Internal DVD, 2. USB, 3. Internal HDD. I had ripped my internal DVD out of the laptop since it ate a disk a while back, the bios will just ignore it. If you set the bios to first boot USB, it will get stuck in an infinite boot loop and you wont get to where you want. Reboot, and while the bios post screen is up, hit F12 and select to boot from USB device. It will not boot, you should see a flashing cursor in the upper left corner. Hit CTRL-ALT-DEL to reboot, this time around that blinking cursor will start spinning and you will shortly see the iboot boot loader screen! I just swapped in my retail copy of Snow Leopard, hit F5 and booted/installed following Tonymacx86.com’s install guide. No boot loader flags were needed. This surprised me since I was unable to get the software to boot in the VM. I still have not solved that problem. Thanks again cyberx86!
Great to know you got things working. Thanks for the detailed explanation, hopefully anyone who has the same problem in future will have an easier time with it now.
Though its old guide but as i am trying to install older version of OS X so it is the perfect one for me. I’ve Dell XPS 17 system with i7, 16gb ram, 3gb graphics with 3d support, 2 internal hard disks, yes it support 2 (one SSD recently bought and other 500 gb SATA with Win 7 ultimate on it). i want make the SSD tripple boot i.e. OS X (ultimately mountain lion but starting with snow leopard), Win 7/8, Linux (Poseidon 4 64bit). Basically i’m researcher, working on neural networks and also want to do some web development. so probably most of the time, i will be working in Peseidon. however i need some flavor of OS X for web design and also old user of Win. Well, coming to the point… I followed your steps as stated till 10-E and skipped those which i thought would be unnecessary i.e. like my SSD has GPT so no need the steps for MBR. In the next step i created bootable CD from iBoot ISO image. Now i can successfully boot from iBoot and can choose the USB drive to install OS X but i get error about kernal panic. Important point is that it didn’t happened when i did the same in virtual box but here it happens. i tried many times but same error. I would like to ask, what possible solution can be for this error?
Thanks in advance.
Firstly – let me just say how cool it is to have someone with such similar interests comment on my site. I am a big fan of artificial neural networks, although I don’t get to play with them as often as I would like.
There is a good chance that the problem relates to the ‘busratio’ of your CPU. The kernel recognizes some busratios by default, but any non-standard ones must be specified manually. When using iBoot (which last time I checked, was based on the Chameleon bootloader), you can specify boot options at a command prompt before booting a system.
If you have an Intel processor, you can find the bus/core ratio by looking up your processor on their site (for instance, my laptop has a Core i5, 430M processor – it’s busratio is 17). There is also a handy list of some of the first generation Core i3/i5/i7 processor bus ratios, here. So, if I want to boot my installer, I have to specify busratio=17 at the chameleon prompt. Other than that, try a few different settings (and perhaps a different version of iBoot – there used to be some versions for specific chips, and I believe I used one of the non-standard versions in the end. I think they might have done away with that though, and gone with a single version).
Typically, OSX will only run on chips Apple has used in its products (which means that running it on a Intel Pentium, or AMD chip requires special modifications to the installer). Good luck with the setup.
first of all, nice to know that you are also interested in ANN. i wrote few research papers on improved NN.
Well, i found busratio for my processor from intel’s site (Link: http://ark.intel.com/products/49024/Intel-Core-i7-740QM-Processor-6M-cache-1_73-GHz) i.e. 13. so i followed your instructions and wrote busratio=13 (it appears at the bottom left corner) but still the same result. i tried some other dmg files like iAKTOS etc. but same result. i don’t know whats wrong. i eagerly want to install OS X and actually want to install “Mountain Lion” also the problem is that there is NO outlet where i can buy the retail DVD, though i want to buy one! and u know IT guys can’t wait so long to install and try and try… (it has been more than a week now). so when i see the msg similar to kernel panic i also get panic :P. Now seriously thinking to forget OS X and install Win & Poseidon but its not my type. i still wanna fight with OS X!!! Any other suggestion please?
oh, and do i forget to mention that my system is 64 bit? and i remember somewhere it was also advised to use -v flag. whats that???
I have always been fascinated by neurobiology (my degree is in biology) – my love of computers makes ANNs a natural combination of the two interests (I’d love to build a ANN on an FPGA some time actually). I have toyed around with some ideas of implementing distributed ANNs in the cloud, but find that models such as back-propagation are extremely inefficient compared to the actual basis for biological learning.
With regard to OSX,
-vis for verbose – it will show more details as to why something doesn’t boot. (Not specifically related to 64bit processors). You could tryarch=i386, which will let some other hardware work in 32bit mode (even though you have a 64-bit processor). Also-x– which turns on safe mode, is a handy one to try. Chances are that some combination of boot parameters will get you booting successfully. If you managed to get the installer booting in VirtualBox, it has the capability to work, and is limited by discrepancies between its expectations and your underlying hardware. Check out the lists of boot parameters here and here and see if you have any luck with them. (Also note down the specific kernel panic – might shed some light on the problem).its great to know that we are from same school of thought. in fact my interest is COGNITION (anything related to brain) so i do read some literature about brain physiology, psychology, philosophy etc. and always been interested about how brain perform certain functions and how those can be mimic in computer and i am still on the quest… sounds like we can work on some common interests 🙂
about the OSX part, i tried different flags but there is no use. below is the information i get at the end where the system halts:
Hope this information will be helpful…
The brain is truly a fascinating thing.
Just looked over the details you posted a bit more carefully – is your kernel version 10.5.0 or 10.6.0? If it is 10.5.0, it won’t boot without a lot of modification (while 10.6.0 should work okay).
A couple ideas come to mind, not sure what you have explored already:
Hi, thanks for your help and useful hints. it is really very easy and great guide but probably not fit for XPS scenario. i found another one on insanelymac (link: http://www.insanelymac.com/forum/topic/273500-mac-os-x-lion-install-guide-for-dell-xps-17-l702x-optimus/) though mine is XPS L701x and it is for XPS L702x but i will try with some modifications. Thanks again! cheers! 🙂
Thanks for the link. Hope it works for you.
I have loaded your site in 3 different internet browsers and I must say this website loads a lot quicker then most. Would you mind emailing me the name of your web hosting company? My personal e-mail is: {removed}. I’ll even sign up through your affiliate link if you would like. Appreciate it
This site is hosted on Amazon EC2 – see the ‘About’ page for more details.
Using ML2 to install onto the usb-worked perfectly right up until the 3rd line command in terminal (moving files to usb) does not recognise the folder/path. Also those having trouble with the apple logo hanging-I found that once you shut down the machine and restart it works!
Oh and i forgot to say-very good clear guide (probably the best on the net) I had a few problems throughout but thanks to the explaining of steps was able to google problems. Frustarting that its failed on the last step.
Ok just seen a post midway down which explains a little more. I am able to use the ls command to get as far as OSInstall” and then it gives me the “no such file or directory”. Well yes i guess it wouldnt exist yet as I havent copied the file. Anyway around this?
All working now i believe. Perhaps I had the path slightly incorrect but it now works.
Many Thanks for what i believe its the best tutorial on the net for preparing the USB installer.
Glad it was able to help you out, hope the new install works well for you. Thanks for reading and commenting.
Hi,
does this method allows us to run ONLY mac os x. i mean is is running inside the windows.(like VMware)
thnx..
This method lets you setup an installer for Mac OS X. What you do with that installer is mostly up to you. It was intended to be used to create a dual boot system – that is have two operating systems installed, but you only boot into one at any given time. However, you should be able to adapt it to running in a virtual machine if you want (since it is only getting you to a functioning installer, not actually detailing how to install it).
There is an error after boot an image of Mac OS
Sorry to hear that – quite likely one of the settings in your bootloader will resolve that.