This was completed 2 weeks ago, but I am only now getting around to posting it online. This experiment was purely for the fun of it – I don’t own (or want) a cell phone, and have never used Android. However, it is an interesting operating system, and I always enjoy playing around with such things – it’s the process more than the end result.
Android 4 – Ice Cream Sandwich (ICS) is more compatible with x86 architectures than previous versions, and even includes a VirtualBox make profile. The default build, however, lacks a few things. Notable among these are mouse support, and network DNS (networking is enabled though).
One of the differences in my approach, is that I used Amazon’s EC2 to do my compiling (mostly because it let me download the few GB of files in a few minutes, and I could throw as much disk space and processor power as I wanted at the task for relatively minimal cost).
Estimated time: 2 hours
Cost (on EC2): $0.45 (2x$0.216 + misc)
Since EC2 has a variety of instances, it helps to know what is the limiting factor in compiling – CPU, memory, or I/O.
I/O is dealt with by using a RAID0 array of ephemeral disks. The xlarge instances provide 4 ephemeral disks, which can easily be assembled into a RAID0 set using mdadm. It is worth noting that while many reports do suggest that EBS volumes are faster, with a 4 disk RAID, the performance should be acceptable (and without the cost that would be incurred by using EBS).
That leaves RAM vs CPU. My observations found that the entire process needed about 3GB of memory (although, the Android site recommends 16GB, including swap), but that CPU was easily maxed out. I tried both m2.xlarge and c1.xlarge instances for this task – there really wasn’t as big of a difference as I would have expected (although, the processes weren’t run with the intention of comparing the instances). I would favour the c1.xlarge for this task.
The c1.xlarge has 8 cores (’20 ECUs’) and 7GB of memory – it is comparable to a mid-high end desktop, clocking in at about 75GFLOPS.
The recommended operating system for building Android is Ubuntu 10.04 – however, for interest sake, I opted to use, Ubuntu 11.04. I chose a instance-store AMI (ami-21f53948), since these include the ephemeral storage by default (and have no disk cost associated with them). (The intent here being to save some setup time and, of course, keep costs to a minimum).
To get started, we create a spot request, for one c1.xlarge instance, in any availability zone. At the time of writing, the spot price was $0.216/hr (which is a bit more than the spot price of the m2.xlarge, at $0.153, although, the latter has more variation). Unless you are im a particular hurry, the spot instances are the most cost effective for a fairly short task – just remember to overbid somewhat to prevent unwanted termination in the middle of your task.
Once the instance launches, SSH into it using your keypair (and the username ‘ubuntu’). If, like me, you aren’t used to using Ubuntu AMIs, the default settings (lack of scrollback, status bar at the bottom, the idea of ‘windowed sessions’, etc.) will be a bit alien at first, but it does grow on one.
Initial Preparation
We will begin by getting the instance up to date and installing the necessary dependencies. One point of mention is that Ubuntu 11.04 uses GCC v4.6 – which is not compatible with the Android code (it needs v 4.4).
Since all of the initial commands need elevated privileges, I like to run sudo in interactive mode initially. Just be aware of what you are doing (even if this is a ‘throwaway’ instance). Alternatively, you can prefix each of the first few commands with sudo.
sudo -i
apt-get update
apt-get install git-core gnupg flex bison gperf build-essential zip curl zlib1g-dev libc6-dev lib32ncurses5-dev ia32-libs x11proto-core-dev libx11-dev lib32z1-dev libgl1-mesa-dev g++-multilib mingw32 tofrodos python-markdown libxml2-utils gcc-4.4 g++-4.4 python-lunch gcc-4.4-multilib g++-4.4-multilib
Symlink one file to resolve some naming issues:
ln -s /usr/lib/i386-linux-gnu/libX11.so.6 /usr/lib/i386-linux-gnu/libX11.so
RAID0 Setup
Now, of the three major determinants of compile speed (CPU, memory, and I/O) the choice of instance type has addressed the first two, and partly addressed the third. Given 4 ephemeral disks, and at the cost of a few CPU cycles, we can assemble them up in a (software) RAID0 setup.
We will use the ‘multiple device administration’ tool (mdadm) for creating the softRAID. (Answer ‘y’ (yes) to the warning that the disks contain an ext2fs file system.) and will format it to ext4.
apt-get install mdadm
umount /mnt
mdadm --create --verbose /dev/md0 --level=0 --raid-devices=4 /dev/xvdb /dev/xvdc /dev/xvdd /dev/xvde
mkfs.ext4 /dev/md0
mount /dev/md0 /mnt
SWAP Setup
The Android documentation recommends a combined total of 16GB of RAM + Swap. We have 7GB of RAM on this instance, but since we have an abundance of available space, we will add 20GB of swap space, on our new RAID0 device. I actually didn’t find the instance needing more than about 3GB of RAM at most during this procedure, but since the setup is easy, there is no harm having the SWAP available.
dd if=/dev/zero of=/mnt/swapfile bs=10M count=2048
mkswap /mnt/swapfile
swapon /mnt/swapfile
VirtualBox
One of the last steps of the compilation process uses Virtualbox’s VBoxManage program to convert an img file to a vdi disk. You can omit this step and do the conversion manually on your own, it works just fine (although, the compile process will display an error at the end if you skip this step).
echo deb http://download.virtualbox.org/virtualbox/debian oneiric contrib >> /etc/apt/sources.list
wget -q http://download.virtualbox.org/virtualbox/debian/oracle_vbox.asc -O- | sudo apt-key add -
apt-get update
apt-get install virtualbox-4.1
Java
mkdir -p /opt/java/64/ && cd $_
wget http://download.oracle.com/otn-pub/java/jdk/6u29-b11/jdk-6u29-linux-x64.bin
chmod +x jdk-6u29-linux-x64.bin
./jdk-6u29-linux-x64.bin
Directory Setup
mkdir -p /mnt/android/{bin,working_dir}
chown -R ubuntu /mnt/android/
We are going to throw in a optional modification that seems to improve the success rate of downloading the Android source:
sysctl -w net.ipv4.tcp_window_scaling=0
Finally, we exit the interactive sudo, and resume normal user operations:
exit
Prepare the Environment
Note, we have finally logged out of the root user account – the rest of the steps are done as the user ‘ubuntu’.
echo 'export PATH=/mnt/android/bin:/opt/java/64/jdk1.6.0_29/bin:$PATH' >> ~/.profile
export PATH=/mnt/android/bin:/opt/java/64/jdk1.6.0_29/bin:$PATH
(The first line above adds the new PATHs to our profile so that if we launch multiple sessions all will have them, the second applies it to our current session).
Download the repo program, and make it executable:
curl https://dl-ssl.google.com/dl/googlesource/git-repo/repo > /mnt/android/bin/repo
chmod a+x /mnt/android/bin/repo
cd /mnt/android/working_dir
Get the Source
At this point, we are ready to start obtaining the Android source. First we will initialize the repository – the process only takes a few seconds. When asked, enter a name (or alias) and an email address – they are only used if you commit code back to Android, so even a local version will suffice for now. Also, answer ‘y’ (yes) to the two questions.
repo init -u https://android.googlesource.com/platform/manifest
A quick note before proceeding: there is a parameter that shows up in many of the following commands ‘j’. It refers to the number of ‘parallel jobs’ that will be executed. Recommended values vary from <CPU Cores>+1 to 2x<CPU Cores>. There are 8 cores (20ECUs) on a c1.xlarge, so I used numbers between 12 and 16 for CPU limited tasks. For higher numbers, I found a high percent of CPU went was used by the kernel scheduler (i.e. high ‘sy’ value in top).
Now to download the source itself – it is on the order of 6GB, so on a normal connection it would take a while – this instance however can download at 300Mbps, so you won’t need to keep this running overnight. This one isn’t CPU limited, so I limited the amount of parallel jobs. (There are some definite pauses in the process, but it completes fast enough). You can go to the next part while this downloads.
repo sync -j4
Some time stats:
real    9m6.746s
user    9m58.865s
sys     2m47.034s
Now that is a good reason for using EC2 – 9 minutes to download the entire Android source code!
We will import the Android GPG key for authentication. The following command will wait for you to paste the key:
gpg --import
Copy and paste key (from: Android Open Source), press Enter and key in Ctrl+D (End of File) to finish.
Building a new Kernel
Since Android is meant for touchscreen devices, it doesn’t include support for a mouse pointer by default (although, it does, natively, support a mouse). We need to rebuild the kernel with mouse support if we want to use a mouse. (This is a compiling task, and although short, is CPU intensive – we can do it at the same time as the source download though, since that is more of a network limited task). There are, on the order of 1 million files, in about 230MB.
cd /mnt/android
git clone https://android.googlesource.com/kernel/goldfish
This will create a new folder with the kernel source (code named ‘goldfish’)
Again, some time stats:
real    2m1.745s
user    1m14.033s
sys     0m14.389s
We switch to the new directory, and checkout the target branch. This finishes in a few seconds:
cd goldfish
git checkout origin/android-goldfish-2.6.29
real    0m14.239s
user    0m2.596s
sys     0m1.956s
Now that we have the kernel source, we need to modify the configuration and rebuild it. There is a graphical interface that is included that will allow us to do this quite easily.
cp arch/x86/configs/vbox_defconfig .config
make CC=gcc-4.4 CXX=g++-4.4 ARCH=x86 menuconfig
It will take a few seconds to compile and load. Once it does, use Up/Down arrows to navigate, enter to select (i.e. to expand), ‘y’ (or space) to include. Not being accustomed to the interface, I had expected that expanding a category would show all its sub-items. This is only true if you have selected the category first. An unselected category shows no entries – definitely drove me crazy for a time.
To include mouse support:
- Select/Expand ‘Device Drivers’
- Select/Expand ‘Input Device Support’
- Include ‘Mice’
(You can then expand ‘Mice’ and see the included drivers, in particular, ‘PS/2 mouse’ should be selected)
You can use ‘Esc’ (twice) to work your way out of the program, or repeatedly select ‘Exit’. Remember to save when asked.
Having made the necessary change to the kernel configuration, we can now compile it. It doesn’t take too long, so I picked a low ‘j’ value. It is important to note that if you omit the CC and CCX parameters, that the compile will terminates prematurely (on this setup), without an explicit error, as it will use version 4.6.
make CC=gcc-4.4 CXX=g++-4.4 ARCH=x86 -j8
The above command ends with an output similar to the following :
Root device is (202, 1)
Setup is 11180 bytes (padded to 11264 bytes).
System is 2401 kB
CRC a247138c
Kernel: arch/x86/boot/bzImage is ready  (#1)
The path to the new kernel is displayed on the last line.
The obligatory time stats:
real    1m37.901s
user    6m17.308s
sys     1m51.835s
Replace the Kernel
If the download of the ICS source is complete at this point, you can carry on, otherwise, you will need to take a bit of a break while it finishes.
For interest sake, the location of the kernel that is used by the vbox_x86 build configuration can be determined by the following:
grep "LOCAL_KERNEL :=" /mnt/android/working_dir/build/target/board/vbox_x86/device.mk
We will copy both our new bzImage and vmlinux to overwrite their ICS versions. I don’t think replacing the latter (vmlinux) is strictly necessary, but it worked fine replacing both.
cp /mnt/android/goldfish/arch/x86/boot/bzImage /mnt/android/working_dir/prebuilt/android-x86/kernel/kernel-vbox
cp /mnt/android/goldfish/vmlinux /mnt/android/working_dir/prebuilt/android-x86/kernel/vmlinux-vbox
Setup DNS
While networking does function on VirtualBox install of Android, it does not appear to get the default DNS servers. One way around this is to use some publicly available DNS servers, such as those provided by Google (8.8.8.8). We can hard code this into the default properties of our build using the following:
echo "Net.eth0.dns1 = 8.8.8.8"  >> /mnt/android/working_dir/out/target/product/vbox_x86/root/default.prop
echo "Net.dns1 = 8.8.8.8"  >> /mnt/android/working_dir/out/target/product/vbox_x86/root/default.prop
We are now, just about ready to start building the code. Firstly, however, we need to finish setting up our environment.
cd /mnt/android/working_dir
. /mnt/android/working_dir/build/envsetup.sh
Note: there is a space between the dot and first slash on the above command. The dot is a short form for the ‘source’ command.
Setup the Compiler Cache
As I got used to the layout of the Android code, I found that things didn’t always work out the first time – I sometimes had to compile the code more than once, making slight changes in between. Unfortunately, it takes around an hour to compile. You can greatly reduce the compile time for subsequent compilations (after the first) by use the compiler cache. To set up a 20GB cache, on our RAID disk we can run:
export USE_CCACHE=1
export CCACHE_DIR=/mnt/android/.ccache
prebuilt/linux-x86/ccache/ccache -M 20G
If you want to monitor the cache, you can do so using
watch -n1 -d prebuilt/linux-x86/ccache/ccache -s
Build ICS
We are now ready to build. The first step is to select the target using lunch.
lunch vbox_x86-eng
This will output some information about the build, similar to that below:
PLATFORM_VERSION_CODENAME=AOSP
PLATFORM_VERSION=4.0.1.2.3.4.5.6.7.8.9
TARGET_PRODUCT=vbox_x86
TARGET_BUILD_VARIANT=eng
TARGET_BUILD_TYPE=release
TARGET_BUILD_APPS=
TARGET_ARCH=x86
TARGET_ARCH_VARIANT=x86
HOST_ARCH=x86
HOST_OS=linux
HOST_BUILD_TYPE=release
BUILD_ID=OPENMASTER
To initialize the build itself, we run make, specifying the correct compiler. I opted to use a ‘j’ value of 12 which seemed to work reasonably.
make CC=gcc-4.4 CXX=g++-4.4 -j12
The above process takes just under an hour to complete, as per the time stats below:
real    53m22.432s
user    340m49.770s
sys     38m32.665s
Recompiling, however, (with the cache enabled) takes only about 15 minutes.
The last lines of the output describe the location and size of the image:
Install system fs image: out/target/product/vbox_x86/system.img
out/target/product/vbox_x86/system.img+ total size is 268435456
Build the VirtualBox Android Disk
Finally, we build the VirtualBox image we will be using:
make CC=gcc-4.4 CXX=g++-4.4 android_disk_vdi -j12
This process finishes fairly quickly, taking only a few seconds, as below:
real    0m35.250s
user    0m20.629s
sys     0m4.856s
Three images are created (boot, system, userdata) and added to the android_disk.img file. Finally, the image is converted to a VDI format using the VirtualBox tools installed at the beginning. Output resembles the following:
Copying images to specified partition offsets
I/diskutils(32627): Writing RAW image 'out/target/product/vbox_x86/boot.img' to 'out/target/product/vbox_x86/android_disk.img' (offset=17563648)
I/diskutils(32627): Wrote 2738176 bytes to out/target/product/vbox_x86/android_disk.img @ 17563648
I/diskutils(32627): Writing RAW image 'out/target/product/vbox_x86/system.img' to 'out/target/product/vbox_x86/android_disk.img' (offset=28560384)
I/diskutils(32627): Wrote 268435456 bytes to out/target/product/vbox_x86/android_disk.img @ 28560384
I/diskutils(32627): Writing RAW image 'out/target/product/vbox_x86/userdata.img' to 'out/target/product/vbox_x86/android_disk.img' (offset=296996352)
I/diskutils(32627): Wrote 52428800 bytes to out/target/product/vbox_x86/android_disk.img @ 296996352
File edit complete. Wrote 3 images.
Done with bootable android disk image -[ out/target/product/vbox_x86/android_disk.img ]-

Converting from raw image file="out/target/product/vbox_x86/android_disk.img" to file="out/target/product/vbox_x86/android_disk.vdi"...
Creating dynamic image with size 349425664 bytes (334MB)...
Done with VirtualBox bootable disk image -[ out/target/product/vbox_x86/android_disk.vdi ]-
Build the VirtualBox Android Installer
Alternatively, you can create an Android Installer disk instead. The resulting process takes a bit longer, and produces a larger image. To do so, run the following (instead of the command above):
make CC=gcc-4.4 CXX=g++-4.4 installer_vdi -j12
End of the output:
Converting from raw image file="out/target/product/vbox_x86/installer.img" to file="out/target/product/vbox_x86/installer.vdi"...
Creating dynamic image with size 529080320 bytes (505MB)...
Done with VirtualBox bootable installer image -[ out/target/product/vbox_x86/installer.vdi ]-
Time information:
real    0m53.854s
user    0m21.225s
sys     0m8.601s
Converting an IMG to a VDI
If you omitted the VirtualBox install, you can use a command like the following (on Windows) to make the conversion:
"C:\Program Files\Oracle\VirtualBox\VBoxManage" convertfromraw -format VDI android_disk.img android_disk.vdi
After all of the above, the relevant files that can be found in out/target/product/vbox_x86 are (the .tgz is from the next step):
-rw-rw-r-- 1 ubuntu ubuntu 349425664 2011-11-27 05:32 android_disk.img
-rw------- 1 ubuntu ubuntu 188751872 2011-11-27 05:45 android_disk.vdi
-rw-rw-r-- 1 ubuntu ubuntu 195125495 2011-11-27 06:01 android_images.tgz
-rw-rw-r-- 1 ubuntu ubuntu   2738176 2011-11-27 05:28 boot.img
-rw-rw-r-- 1 ubuntu ubuntu 529080320 2011-11-27 05:52 installer.img
-rw------- 1 ubuntu ubuntu 196091904 2011-11-27 05:52 installer.vdi
-rw-rw-r-- 1 ubuntu ubuntu    232451 2011-11-27 05:28 ramdisk.img
-rw-r--r-- 1 ubuntu ubuntu 268435456 2011-11-27 05:28 system.img
-rw-r--r-- 1 ubuntu ubuntu  52428800 2011-11-27 05:05 userdata.img
Uploading to S3
Given that time an item of consideration on EC2, we do not want to keep our instance running while we download and play around with the images. As such, we can upload them to S3, and then terminate the instance. The simplest way to accomplish this is to use Tim Kay’s aws script:
Create a file with as below, with your Access Key ID (line 1) and Secret Access Key (line 2), and restricted permissions:
vi ~/.awssecret
chmod 600 ~/.awssecret
Download the script and install:
curl https://raw.github.com/timkay/aws/master/aws -o aws
perl aws –install
Compress the images (significant space savings), and upload to S3 (if you don’t already have an S3 bucket, create one first):
cd out/target/product/vbox_x86
tar -czvf android_images.tgz installer.vdi android_disk.vdi
s3put bucket_name/android_images.tgz /mnt/android/working_dir/out/target/product/vbox_x86/android_images.tgz
Once the above command exits, you can terminate your instance if you do not anticipate needing to make changes to your image. Of course, if you expect to need changes, keep the instance around because everything is already setup, and the compiler cache will save a lot of time.
Final Notes
- RAM usage never went above 50% – it was typically on the order of 3GB, swap was unused
- CPU was maxed out when compiling (typically 85% us, and 12% sy) – load average hovered around 12 while compiling. Typical steal values were 2-3%
- The advantage of this approach is that AWS doesn’t charge for data transfer in, and ephemeral disks have no cost for allocated space or I/Os, meaning that you only pay for the instance time and the download of the final product.
VirtualBox Setup
Once you have your compiled image, you need to setup VirtualBox to use it.
- General:
- Operating System: Linux
- Version: Other Linux
- System:
- Boot from Hard Disk
- Allocate about 1GB of memory (although, it will run on much less)
- Enable PAE/NX
- Display:
- Allocate some memory to graphics – I go with 64MB
- Storage:
- Add your android_disk.vdi as an IDE Hard Disk (not a SATA disk) – remove any SATA controllers
- Network:
- Enable Adapter #1 and setup as Bridged Adapter (you need to enable this during the setup of VirtualBox before it can be used here)
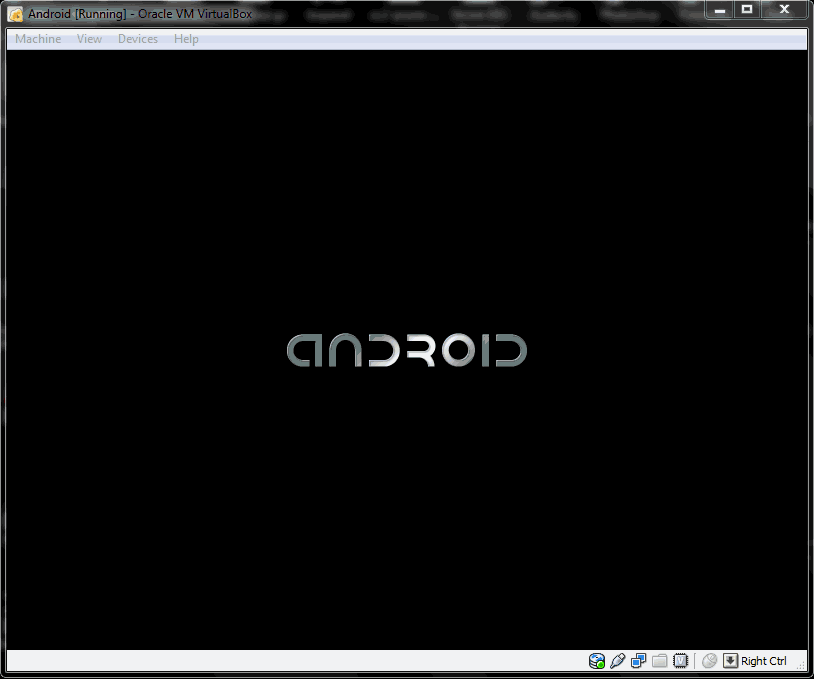
Save the settings and start the virtual machine. You may get an error about sound and 16bit displays, but dismiss them for the time being.
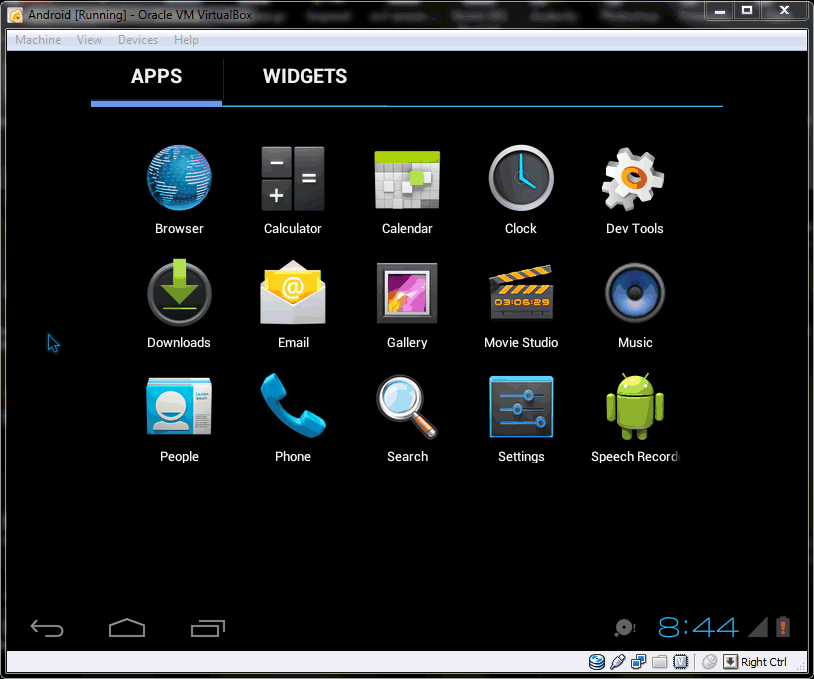
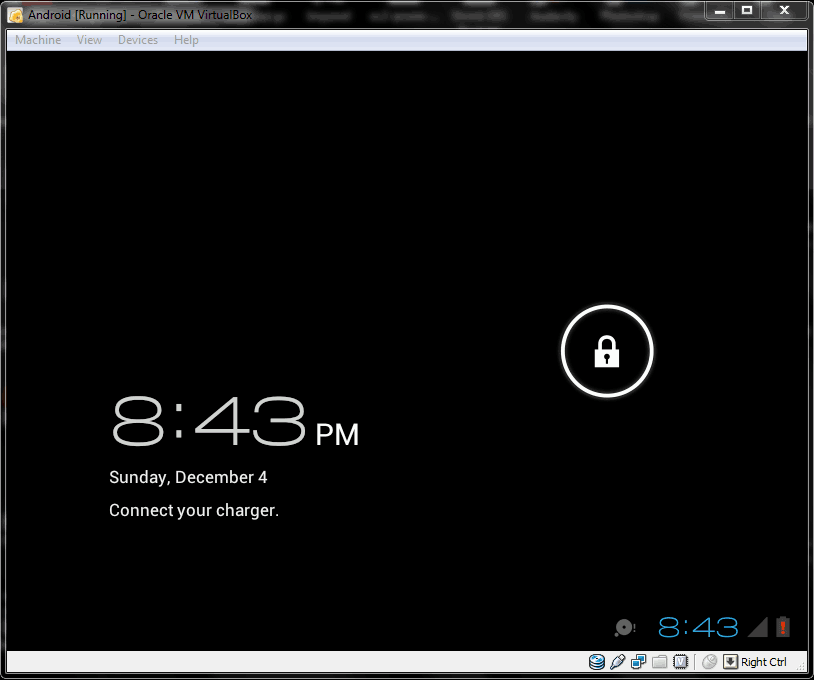
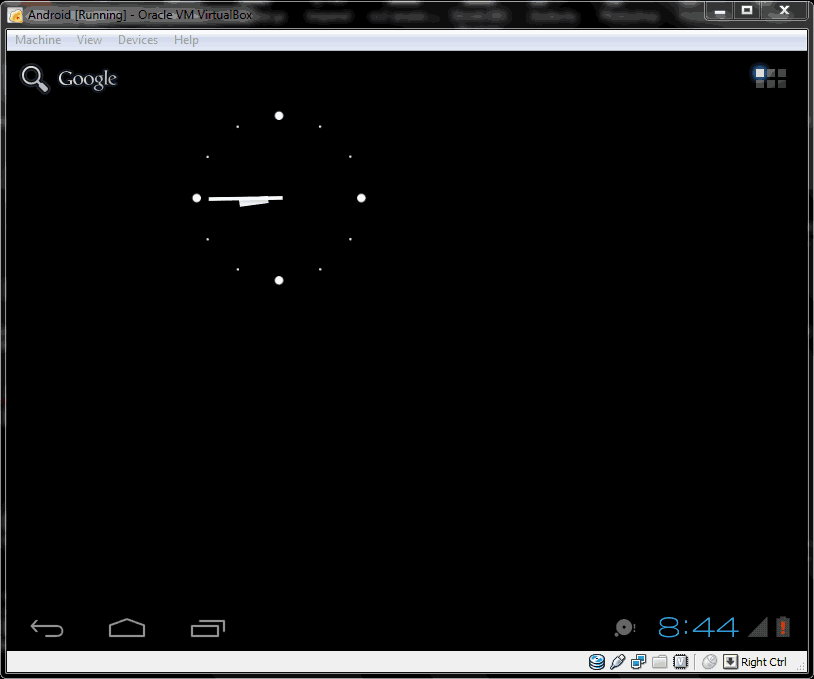
Once it boots up, you may get an error regarding low battery (i.e. Connect your Charger), you can dismiss the page using Ctrl+Esc. To capture your mouse, just click inside the VirtualBox window (to uncapture press the right Ctrl key – or whatever your host key is if you changed it).
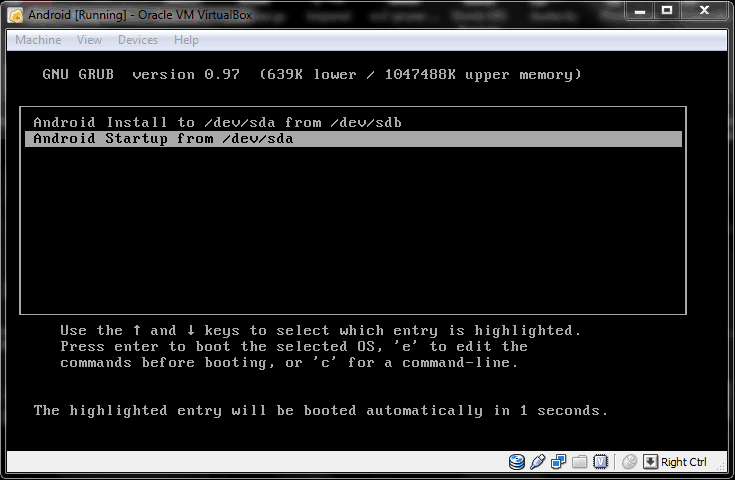
If you want to use the installer instead of the android_disk.vdi, you should create an additional empty virtual hard drive to which you can install. Select the installer_disk.vdi, using F12. At the GRUB screen, choose “Android Install to /dev/sda from /dev/sdb”, and reboot (use command ‘reboot’) when done, booting from your new device (use F12 to change if needed.)
The speed of the virtual machine was fairly good – everything seemed responsive enough.
Known problems:
- Sound – haven’t tested it, but I don’t think it would work without some modifications
- Stability – not so great – it runs, but you do see the occasional error – luckily it just lets you continue and you don’t need to restart the machine.
- Storage – the default disk needs to be made larger – this is easy enough, but would be worthwhile change.
- Battery – displaying as discharged, and starts with Connect Charger screen.
- Network – wireless doesn’t display as connected (even though there is network access).
- Desktop – can’t set a background – just displays as black with the widgets and controls.
- Haven’t yet had any success playing a video
Very interesting indeed. I may try to follow your instructions someday. Thanks for a good read!
(Side note: would you care to make available the image/installer you created? I would like to take Virtualbox Android for a ride! :D)
Thanks for the comment. Glad you found it interesting. I am not really in the habit of making end products available – my focus being more on the process, but I figure I can make an exception. You can download the file (android_disk.vdi – zipped) from http://ge.tt/8YoCUAB (107MB). Having never had the occasion to distribute large files before, I can’t say anything about the file sharing site I have used. As would be standard, the file is provided without any warranty or claim of functionality – if your computer turns into an Android and takes over the world, I take no responsibility!
Here’s a blog article (based on the above one) which guides you through the compilation procedure of ICS with Intels x86 (hardware-assisted) Linux Kernel for the emulator-x86.
Precompiled images and a quickstart guide are available:
http://blog.testobject.org/2012/04/giving-your-android-emulator-boost.html
Just out of curiousity, how much did the bill from Amazon come out to for this? Was it close to the $0.45 you estimated? I’m looking at doing this for regular ICS builds for a couple of ARM devices and I don’t have a big machine at the moment.
Well, that depends on what you include in the ‘bill’. Amazon doesn’t charge for incoming data – so the download was free – the main cost was the instance, and there is a minor cost to upload the final product from the instance. It really did take me two instance hours (I think it was about an hour and a half or so) to do everything start to finish, so $0.45 was fairly close (within a cent or so) to the cost. However, I didn’t get it right on my first try – between the Android server being overloaded (couldn’t download a full copy of the code the first few tries) and having never worked with Android before, I spent an additional 14 hours (and $2.44 – I used both c1.xlarge and m2.xlarge for testing) trying to figure it all out and get things to work. The cost of $0.45 was how much it would take to follow the procedure outlined in one go. There shouldn’t be any additional costs – but if there were, they would be buried in my regular monthly AWS bill.
Hello,
I build android ICS for virtualbox as your wrote above and it did works. However, I am facing a problem that the resolution changing will cause “Unfortunately, system UI has stopped” error. The resolution is 800×600 as default, everything works fine with this resolution. But if I change it to 1280×800 or else via “vga=ask”, then I will get the system UI error when it started.
Do you have any idea? Thanks a lot.
Sorry, I haven’t come across that issue before. I don’t use Android a lot – the objective of the build was more to see that it could be done and what it would entail than because I actually wanted to make use of it. I’d try some of the Android mailing lists and you might have more success.
Thank you any way.
This is a very useful tutorial, thanks for contributing.
Glad you found it useful. Thanks for reading and commenting.
Hello!
I probably do something wrong… but i followed all of your tutorial and when i launch my .vdi all came up is “GRUB” without anything else….
Quite possible that some of the steps have changed between Ice Cream Sandwich and KitKat. I haven’t had a chance to try this on a later version of Android, unfortunately. It definitely can be made to work, so keep at it, and you’ll get there eventually.
I successfuly build it by choosing your distribution… i would know want to affect it some espace to install small test application…
How could i do that
(btw sorry my english is pretty bad…)
You should be able to resize the VDI image using something similar to:
VBoxManage modifyhd --resize Done thanks… i’m know working on audio input (if you want some info to update the sound part i’ll give as soon as i get some!)
Great to see that you are making progress.
Hey, I am also facing the same problem. How did you solve it, can you please help me. Thanks in advance.
I am facing the same issue, please tell me how did you resolved it. Thanks in advance.
Wow, that’s what I was looking for, what a stuff! existing here at this blog, thanks admin of this site.